Planting
Deep planting will set back the surface-rooting Camellia and must be avoided. This is a major cause of unhealthy plants and promotes root rot. Other tips include;
- Dig the planting hole twice as large as the root ball and to the depth of the pot or bag.
- Improve the soil with compost and/or aged cow manure.
- Soak plant before removing it from the container.
- Firm down soil at base of planting hole before placing plant on top. This ensures the plant does not sink after planting.
- Ease out any roots that are starting to circle the pot.
- Ensure top of the potted plant’s soil is level with existing soil, if not the plant will be too deeply planted and will need to be lifted out and more soil added to the base of the hole.
- Mulch to about 2.5cm with leaf mulch or cow manure and water well.
- You may wish to construct a small collar around the root ball so water is able to be held and allowed to soak in slowly during the plant’s settling in period.
- Extra care, especially with watering, is required if planting during the hotter months.
- Staking may be necessary for the first twelve months if new growth is very vigorous or the plant is placed in a windy spot. Don’t forget to remove ties or ringbarking will occur.
Watering
Camellias should be moist at all times – but caution should be taken against them being WET at all times. Water well and deeply as often as is dictated by the local weather conditions. Too much water, too often will cut off oxygen around the root zone and encourage root rot (which may not show up until the following summer) and the consequent death of the plant.
During flowering, heavily budded trees should be soaked once a week, preferably by watering at the base. Smaller plants and plants in tubs will require relatively little water during this colder period. Spring and summer watering should be increased to promote healthy new growth. A watering system incorporating micro sprays is a worthwhile investment in newly planted areas.
Watering requirements vary greatly from area to area depending on weather patterns, soil structure and microclimates so be guided by commonsense and knowledge of your local area.
Fertilising
Fertilising should begin with the first signs of new growth, even though the plant may still be blooming. Feed regularly during the growing season; September, December and February with a liquid fertiliser such as Aquasol. It is important to water ground well before and after applying fertiliser.
Apply Osmocote Plus as a six month slow release fertiliser in Spring and Autumn. Care should be taken to not overfeed as this can considerably impede the plant’s development. Specially formulated Camellia and Azalea Food is suitable for use on established specimens: eight years and older (avoid using on potted specimens). Top dressing with Blood and Bone and/or good quality milled cow manure is also beneficial. For potted specimens, a combination of Aquasol and Osmocote Plus as discussed above is recommended. Allow newly planted plants a few weeks to settle in before commencing feeding programme.
Pests and disease
Camellias are very disease and insect resistant plants and if proper cultural care is taken, they may never need you to do more than feed and water them. Some plants may be attacked by scale or mites. These pests can be a threat as they suck the plant juices and interfere with normal growth patterns.
- Always be sure of the pest or disease before spraying with an insecticide or fungicide.
- Always read and follow safety directions on any product used where spraying is necessary.
- Spraying is best carried out in the cool of the morning.
Flower balling: Flowers which fail to open or buds which fall off prematurely can be the result of a number of problems:
- Too many buds were set and the bush requires manual disbudding.
- Too much sun for the particular variety.
- Older variety with a natural tendency to ball.
- Formal doubles may ball if salt laden.
- Depending upon the problem, one needs to either move plant, improve cultural practices or replace with a more suitable variety.
 Pruning
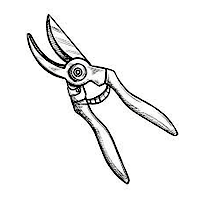
Pruning your camellias from a young age is we, believe, of great importance to their successful cultivation. Pruning to allow air movement through the plant and to retain an open, branching framework will result in more manageable, healthier specimens, which will reward the grower year after year.
To begin, try to imagine the shape in which you would like your camellia to develop and be guided by this when determining where and how much to prune. In many cases, pruning will be limited to removing any dead or diseased wood, growth emanating from within the framework and pruning the outer growth to the desired shape by cutting back to a growth bud/shoot that will enhance the plant’s shape.
The main annual pruning should be carried out before the new spring growth has started (late winter, early spring). Mature Camellias, including reticulatas can be heavily pruned; even reduced to a bare frame. Pruning too late may result in reduced blooms the following flowering season as the blooms appear on the previous year’s spring growth.
When hedging Camellia sasanqua, tip pruning all over each specimen will encourage the bushy growth required. As they grow together, setting up string lines as a guide will result in a professional job. Immediately after pruning it is important to ensure that your plants are continually kept evenly moist and fed with a combination of a complete liquid fertiliser and a slow release to maximise regrowth (refer feeding section).
Pots
Some varieties of Camellia make wonderful pot specimens if some simple guidelines are followed:
- Never overpot. Pot up into pots only 5cm larger in diameter each time you repot.
- Use top quality potting mix for potting.
- Consider the position carefully before choosing (i.e. sunny/shady/windy).
- Use Aquasol and Osmocote Plus for fertilising.
- Do not let dry out completely.
- Do not let pot sit in a saucer of water.

